Templates from Songs For Funerals are made with Microsoft Word.
For each one, you can make your own copy, and edit it with any tool that can edit Word files, eg Google Docs.
Most of the templates use a feature called Tables. This lets you use a row-and-column, ie "tabular" structure to set out the information. You know that a table is used because when you click or hover over it, a small "plus" sign appears at the top-left side of the table - like this:
If you click on the small plus sign (called the Table-selector), the table is selected, and thin white lines show you where the rows and columns are:

You may need to add rows from a table to customise the document for your funeral. There may also be times when you want to delete rows, so that there is more space for other rows.
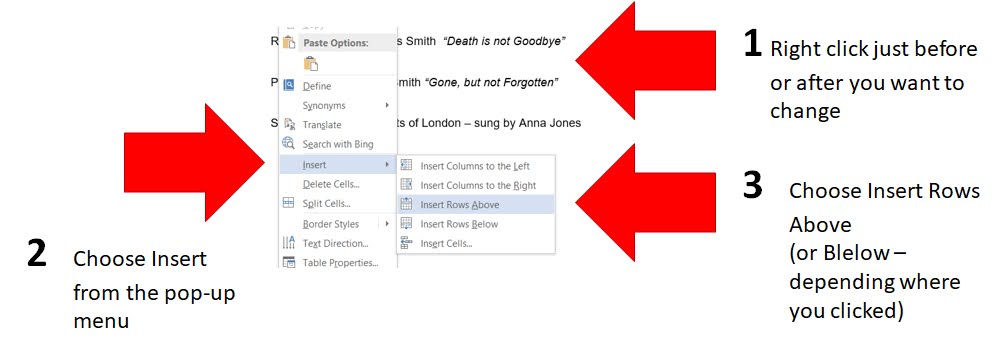
How to add or delete rows from a table in Microsoft Word
To add or remove a whole line, ie a row
- Select the whole line above or below
- Right click
- Chose Insert or Delete
- Choose either Row Above, Row Below (to add a line) or Delete Row (for to remove it)